Pump Cavitation Control Methods That Reduce Seal Damage




Pump Cavitation Control Methods That Reduce Seal Damage
Seal damage rarely begins at the seal.
In many industrial pumps, the first real problem is unstable suction behavior.
That is why pump cavitation control methods matter so much in daily maintenance.
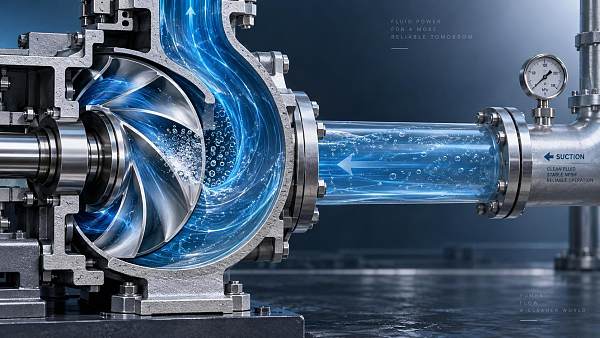
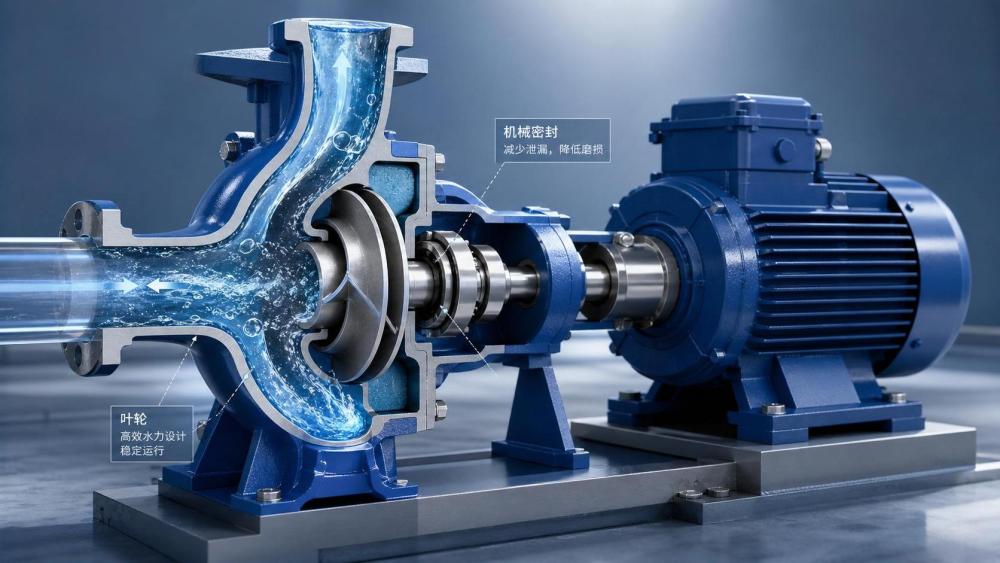
When cavitation starts, vapor bubbles form and collapse inside the pump.
Those collapses create shock loads, noise, vibration, and local heat spikes.
Mechanical seals then face axial movement, face distortion, and poor lubrication.
Over time, leakage increases, flush plans become less effective, and downtime follows.
The good news is that most cavitation problems leave signals before failure becomes visible.
With practical pump cavitation control methods, maintenance teams can protect seals and stabilize operation.
Why Cavitation Damages Seals Faster Than Many Teams Expect
Cavitation is often treated as a hydraulic issue only.
In practice, it quickly becomes a seal reliability issue.
Bubble collapse near the impeller causes fluctuating radial and axial loads.
Those load swings travel through the shaft to bearings and seal faces.
The seal then loses the stable film it needs between mating surfaces.
Once that film breaks down, friction rises sharply.
Heat, face scoring, blistering, and secondary seal hardening can follow.
This is why pump cavitation control methods should be part of every seal failure investigation.
If the root cause remains in the suction system, seal replacement alone will not last.
Early Signs That Point to Cavitation Instead of Normal Wear
The fastest savings usually come from earlier diagnosis.
Several field signals can separate cavitation from ordinary seal aging.
- A crackling or gravel-like sound near the suction end.
- Vibration that increases during flow changes or tank level drops.
- Seal leakage that becomes worse during high-demand periods.
- Unstable motor load or fluctuating discharge pressure.
- Impeller pitting, especially near the inlet eye.
- Frequent bearing temperature rise with no clear lubrication issue.
More telling signals appear when several symptoms happen together.
That usually means pump cavitation control methods should be applied immediately, not after the next outage.
Check NPSH First Before Changing Hardware
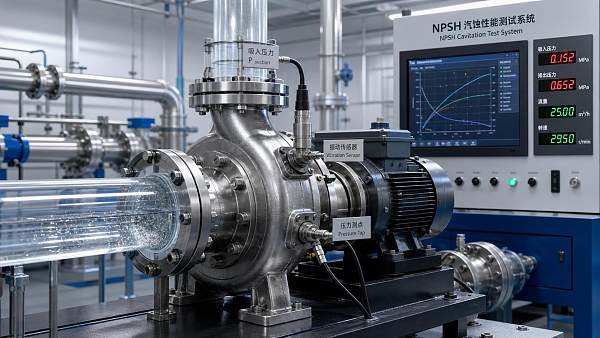
One of the most effective pump cavitation control methods is confirming NPSH conditions.
Many cavitation cases come from low NPSHA, not damaged components.
Start with actual operating data, not design-sheet assumptions.
Measure suction pressure, liquid temperature, source level, and line losses.
Then compare available NPSH with required NPSH at the real flow rate.
If the margin is too small, the seal is already operating in a risky environment.
This often happens after process expansion, fluid changes, or seasonal temperature increases.
From a maintenance perspective, this step prevents expensive but ineffective seal upgrades.
Quick NPSH Review Checklist
- Confirm tank level during worst operating conditions.
- Check if suction strainers are partially blocked.
- Review fluid temperature versus vapor pressure.
- Verify valve positions in the suction line.
- Look for pipe modifications that increased friction loss.
Stabilize Suction Conditions to Protect the Seal Environment
Once low suction margin is confirmed, the next step is stabilization.
These pump cavitation control methods are often simple and highly effective.
Reduce unnecessary elbows and restrictions near the pump inlet.
Keep suction piping short, straight, and properly sized whenever possible.
Eliminate air ingress through gaskets, threaded joints, and mechanical connections.
Even a small air leak can trigger unstable hydraulic behavior.
Where process conditions allow, raise source level or lower fluid temperature.
That increases suction head and reduces vapor formation risk.
These corrections improve more than pump hydraulics.
They also give the seal faces a steadier, cooler, and better-lubricated operating condition.
Match Pump Operation to the Best Efficiency Range
Another overlooked cause is operating too far from the best efficiency point.
At very low or very high flow, internal recirculation becomes more severe.
That raises the chance of cavitation and shaft movement.
Practical pump cavitation control methods often include restoring the duty point.
Review the pump curve against actual system demand.
If the unit is oversized, trimming the impeller or adjusting speed may help.
If demand varies, a variable frequency drive may reduce unstable operation.
The result is lower vibration, less recirculation, and better seal life.
When Operating Point Problems Are Likely
- The discharge valve stays heavily throttled for long periods.
- Flow demand dropped after a process change.
- The pump was selected with too much design margin.
- Parallel pumps cycle unevenly across shifting loads.
Use Seal System Checks as Part of Cavitation Control
Not every seal problem is caused by cavitation.
Still, weak seal support systems make cavitation damage show up faster.
So the best pump cavitation control methods include seal system verification.
Check flush flow, barrier fluid condition, and cooling path cleanliness.
Inspect piping for plugging, wrong routing, or isolation valves left closed.
Review whether the selected seal face materials fit the service.
Hard faces may survive abrasion, but lubrication loss still needs attention.
This matters even more in hot hydrocarbons, light solvents, and flashing services.
Field Actions Ranked by Speed and Impact
In actual plant work, speed matters.
The table below helps prioritize pump cavitation control methods based on common field conditions.
Build a Repeatable Cavitation Response Routine
The most reliable results come from routine, not one-time fixes.
A simple response routine keeps pump cavitation control methods consistent across shifts.
- Record suction pressure, temperature, flow, vibration, and seal leakage together.
- Compare readings at normal load and worst-case load.
- Inspect suction path restrictions before replacing rotating parts.
- Check seal support plans after hydraulic issues are reviewed.
- Trend recurring failures by service, not by seal model only.
This approach makes failure analysis more accurate and repair spending more useful.
It also supports longer equipment life across pumps, valves, and fluid systems.
Final Takeaway
Effective pump cavitation control methods start with seeing cavitation as a system problem.
The seal may fail first, but the cause often sits upstream.
When suction conditions, operating point, and seal support are checked together, results improve quickly.
That means less leakage, lower vibration, fewer repeat repairs, and stronger pump reliability.
For maintenance-driven operations, that is where practical cavitation control delivers real value.
Related News
 How fluid dynamics analysis helps size a chemical process pumpFluid Dynamics ScientistFluid dynamics analysis helps engineers size chemical process pumps for reliable flow, NPSH margin, efficiency, and safer long-term operation.
 How fluid dynamic cavitation analysis predicts pump erosion riskFluid Dynamics ScientistFluid dynamic cavitation analysis reveals pump erosion risks before costly damage occurs. Learn how CFD pinpoints vapor collapse zones, off-design threats, and effective mitigation.
 How to identify industrial pump parts causing repeated seal failuresFluid Dynamics ScientistIndustrial pump parts can reveal why seals fail repeatedly. Learn how to inspect sleeves, bearings, shafts, flush lines, and hydraulic conditions for lasting repairs.
 How to size plunger pumps for high pressure dosing accuratelyFluid Dynamics ScientistPlunger pumps for high pressure dosing: learn how to size flow, pressure, suction, pulsation control, and materials for accurate, reliable chemical injection.
 What drives centrifugal pump price differences for similar duty points?Fluid Dynamics ScientistCentrifugal pump price differences explained: compare efficiency, materials, seals, testing, and lifecycle costs to choose the right pump package.
 What Should EPC Buyers Check in Fluid Equipment Technical Specs?Fluid Dynamics ScientistWhat should an EPC buyer check in fluid equipment technical specs? Explore key checks for duty range, materials, efficiency, interfaces, compliance, and lifecycle reliability.
 How Can Chemical Dosing Costs Be Reduced in Industrial Wastewater Treatment?Fluid Dynamics ScientistHow to reduce chemical dosing cost in industrial wastewater treatment? Discover practical ways to optimize monitoring, mixing, controls, and chemical selection while protecting compliance.
 Which pump cavitation test methods best reveal NPSH margin?Fluid Dynamics ScientistPump cavitation test methods explained: compare NPSH3, vibration, acoustic emission, and endurance testing to verify real NPSH margin and prevent costly pump damage.
 How fluid separation process design affects product purity and yieldFluid Dynamics ScientistFluid separation process design directly impacts product purity and yield. Learn how better configuration, equipment choices, and control strategies improve performance.
 What drives process industry pumps price in corrosive duty applicationsFluid Dynamics ScientistProcess industry pumps price in corrosive duty depends on materials, seals, coatings, testing, and supplier support. Learn how to compare quotes, avoid hidden costs, and choose reliable lifecycle value.
 How Fluid Dynamics Predictive Analytics Improves Pump Failure ForecastingFluid Dynamics ScientistFluid dynamics predictive analytics helps forecast pump failures earlier by linking flow behavior to cavitation, wear, and damage—improving maintenance decisions and reducing downtime.
 What Pump System Technology Improves Energy Efficiency in Chemical Processing?Fluid Dynamics ScientistPump system technology for chemical processing starts with the real duty point. Learn how VFDs, hydraulic design, staging, and controls can cut energy use and improve reliability.